In my previous post on plastic canvas needlepoint, I talked a bit about what it is and what people have done with it. In this post, I chronicle the embarkation of my journey toward understanding what all can be done with it, and how. You can find larger versions of all pictures shown here on Flickr.
How the Internets Have Failed Me
For the most part, the coolest things I’ve seen don’t seem truly inspired. I don’t mean to dis them here… they’re really quite nifty. And a small percentage are downright fantastic.
But here we sit on all the possibilities of three-dimensional stitch work, and people make plain boxes. Some of the boxes are very nice. Some incorporate a little bit of extra three-dimensional-ness in the form of sewing one or more flat, decorational panels to the outside. The bulk of them are just plain ol’ squares.
So far, having been doing this for about two weeks now, I’ve mostly stuck to boxy things myself. One has to start somewhere, after all, and learning the ropes on simple shapes has proven very effective. I, however, have a couple of projects in mind which will require complex shapes and techniques to be successful. I therefore spent most of this morning trying some things out.
Whipstitching Two Pieces Together Along a Custom Curve
In addition to your basic sheets of plastic grid, here are a number of specially-shaped forms available for plastic canvas work – diamonds, circles, triangles, etc. (And apparently if you go overseas they have a wider variety of fancy forms available — hemispheres, pre-made bags, and the like.) The first big project I have in mind, however, will require shapes that have a combination of long and arced sides to be whipstitched together. I needed some idea of how to go about it and what the final product would look like.


This is not particularly new or special. It was a good experience for me, but about the only thing I learned was not to be afraid of using the same hole on one piece of mesh for two different stitches on the other one. The side of the curved-over piece which isn’t whipstitched to another piece of mesh refuses to hold its curve perfectly, as I’m sure you can imagine. It’d be fine if I’d whipstitched it to another piece.
Joining the Edges of Two Sheets of Plastic Canvas in a 2D Manner
Sheets of plastic canvas only come so big. This could be a problem for a couple of projects I’d like to do. Whipstitching is what I did above to bind the two pieces of canvas together. My goal with this experiment was to see if I could whipstitch two pieces of canvas together, flat and seamless, to make a single-looking, larger piece.
This test came in two parts really, each with a subdivision of its own. Part one was about joining straight canvas edges together, and part two was about trying to join a stair-stepped edge together.
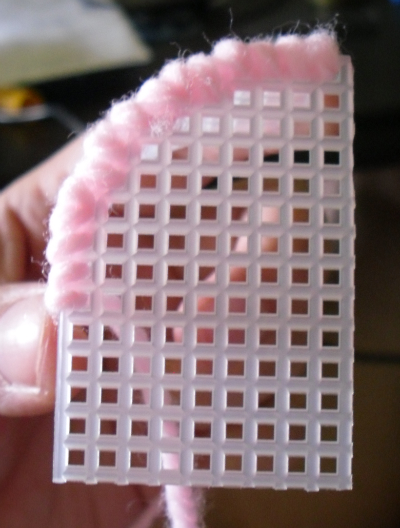
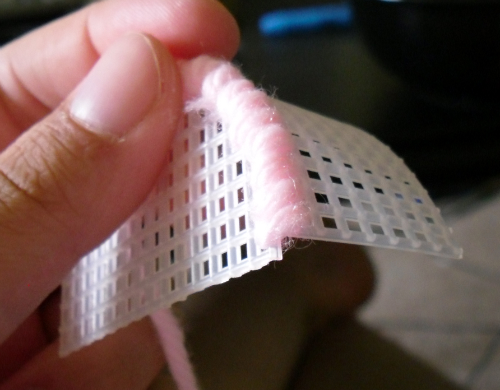
In part 1A, I worked with binding the straight edges of two different pieces of canvas together. The pink one was a 2×35 strip I had laying around from my earliest foray into plastic canvas. I tried looping it around to join the end, but (partly due to the stress of the mesh, which was a particularly stiff variety, trying to stay straight) it put too much strain on the yarn I was binding it with. It would only hold its seamless look while I held it with both hands — I couldn’t even get it to stay in place long enough to photograph it.


Part 1B was an attempt to join two blue rectangles along straight edges. This went reasonably well, until I got to finishing the edge with the overcast stitch. Where the two pieces of canvas came together, the yarn wanted to slip between them instead of staying over them. I was able to avoid that some by going over the spot multiple times.
The real problem with this was that I had trouble keeping one of the two rectangles from moving upwards, shifting out of place. I was able to fix that by inserting my needle under a row of stitches across the backs of both pieces. I couldn’t leave the needle there indefinitely, of course; I’d have to find some kind of pin to leave there permanently for this solution to really work. On the plus side, that would help keep the pieces from folding and/or flopping around — the overall stability is increased.


In part two, I looked at joining two pieces along a stair-stepped edge, to try to take care of the stability problems without having to resort to permanent pins inserted in the back. Part 2A was a major flop simply because the stitches ran with the edge instead of against it. There was no way to join the pieces seamlessly because there was no place to put more stitches going in the same direction.

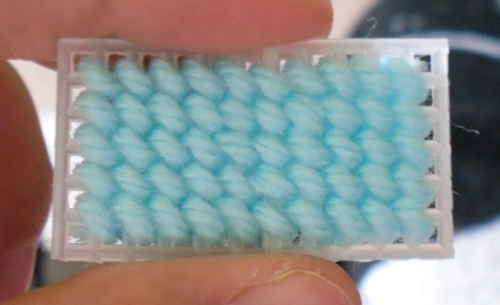
Part 2B, however, went quite well. As I’d hoped, the finished product was much more stable. I made my job easier to start with by shoving a couple of needles through the back to stabilize it while I worked, and when I took them out at the end had no stability problems. The seam isn’t as sturdy as a solid sheet of mesh, of course, but it’s not unsturdy like the joined straight edges above.
The third picture does a great job of showing the flaws here, though. Under the right (wrong?) lighting conditions, a slight height difference is noticeable, making the seam apparent. It also suffers the same sort of overcast stitching problems the straight-edge join had.


Things to Try Next
- Again trying to join two stair-stepped pieces together with the stitches running along the edge. Inability to do that is a serious flaw. If I leave more of the canvas unstitched, I could conceivably overlap the stair-stepped edges more. If it works as I anticipate, it would leave a definite ridge, so it would have to be used judiciously and incorporated into the decoration by design.
- Making a two-dimensional object stick straight up from another piece of mesh. I’d have to find a way to prop it up somehow — there would be a definite right and wrong side to it, too. Probably only good for decorative sculpting. Necessary for a project I have in mind.
- Using a piece of mesh on top of a piece of mesh to force a more three-dimensional look under certain lines. This idea is inspired by puff machine embroidery.